Leica Laser Tracker
SIVAX INC.
3D measurement that expedited the development of automobile models
Convert subtle details in a clay mold into electronic data
Not many people probably know what kind of business Sivax Inc. is engaged in. However, the company has a history of over 55 years since the launch of its business and has been one of the leading companies with a top-level share in the automobile development support field, which is known to everyone in the automobile industry. With its headquarters in Yokohama, the company has set up development centers at various places, developing its business both domestically and internationally.
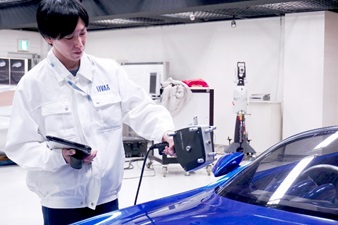
In recent years the company considers their core business to be the automobile development support for automobile manufacturers. They do business with automobile manufacturers in Japan and other countries, engaging in the development of automobile exteriors and interiors from the early stages of planning and design. They have been involved in not only the development of mass-produced cars but also the design and production of concept cars for motor shows as well as the development and production of experimental vehicles for performance experiments, establishing an essential position in the industry.
Their corporate standard based on their corporate philosophy is “QPS,” which stands for Quality, Price, Service, and Speed. With these four points always kept in mind, they have been striving to achieve quality that goes beyond the expectation of their customers. Their sincere and accurate work had been highly acclaimed and the company continues on its path of growth.
For any project in which they are involved from the very beginning, their clay modeler makes a 1/4-scale clay model based on a design drawing and modifies the model so that the lines of each part, such as a body, roof, and bumper, can fit with the concept of the design. In order to measure the finished clay model and convert the measurements into electronic data, they use Leica Laser Tracker AT901 and cantilever 3D measuring system, the Layout Machine, from Tokyo Boeki Techno-System. They have been using the Layout Machine for more than 40 years, with the purchase of more than 100 units in total.
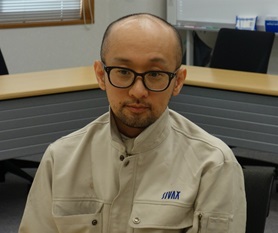
In order to clarify how the 3D measuring systems are used in the model production and development, in which the deadline is very tight, we interviewed Mr. Daisuke Nishioka, a group leader of the Model Group, Mr. Mutsumi Takahashi in the Model Group, and Mr. Tadayuki Ozaki in the Styling Group.
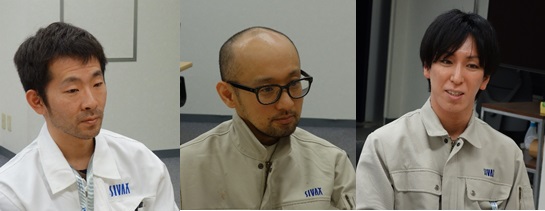
Mr. Nishioka and Mr. Takahashi are in charge of modelling, in which a 3D-model is created from the 2D-design. Repeating discussions with automobile manufacturers and the company’s designers, they get the concept into shape using clay and various resin materials. Mr. Takahashi is mainly in charge of experimental vehicle modelling.
Mr. Ozaki transfers measuring data to CAD software and adjusts fine lines and surfaces on the data. Adjusted surface data will be reflected in the downstream modelling.
Modeling of not only mass-produced car models but also concept cars
Interviewer: I have heard that you already have been working with many automobile manufacturers.
Mr. Nishioka (N): We are mainly involved in the automobile development support business, working mainly with automobile manufacturers. Our work starts with making a design drawing into a 3D model. We may collaborate with the manufacturer’s designers in development or may be commissioned from the design proposal, as our company has a design division. I cannot openly talk about my work due to confidentiality, but I think it is a fun and fulfilling job. We work with various kinds of automobiles, including mass-produced cars, as well as undertaking the design and production of concept cars for motor shows all over the world. Imagining a future car, working with a manufacturer in design, and completing a final shape to show my client. This is the core of my projects.
Mr. Takahashi (T): I am in charge of the production of experimental vehicle models that are mainly used in experiments. As part of important support operations, I modify models based on experimental results and obtain and reflect data to models.
Interviewer: Isn’t it hard to make a real-sized model?
N: Since it is very difficult to start with a full-size model, we make a clay model based on a design drawing at a 1/4 scale. With that model, we discuss about making changes to the shape of the clay, like “let’s change this line in this place” and “let’s make this surface like this,” to decide the final shape of the model. Then, we measure it using a laser tracker and Layout Machine. A hand-held T-Scan is also very frequently utilized. After measuring the model shape and converting the measurement results into electronic data, we move to the next step using CAD software.
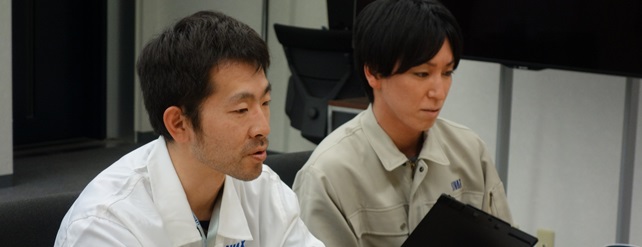
Mr. Ozaki (O): My task is to adjust the shape of a car on CAD software. It is a process of creating surface data that matches a design concept based on the measuring data obtained from a clay model. Since a clay model is shaped by hand, it is somehow impossible with a clay model to fully replicate fine asperity and lines required for a real car. I shape a model in detail with data and generate data from the data-adjusted shape. This data will be the base for a clay model for the next process.
N: We then create a full-scaled clay model based on the numeric data that represent design details. As we further add or remove some clay with the model to fix the design, we again need to measure the adjusted model and convert the measurements into electronic data. Finally, using the data, we make a full-scaled model using hard resin materials. In this process, instead of adding or removing soft material like clay, we use cured resin material obtained from a mixture of a base resin and cure agent to make a full-scale shape and measure the shape with an NC Machine.
Again, measuring the information is the key; we need data that allow accurate replication of the line generated in the molding of a clay model and measuring of the surface data. Therefore, Tokyo Boeki Techno-System’s measuring equipment is widely utilized for various applications.
More than 40 years of trust leading to new purchases
Interviewer: We have been working with you for a long time. Your company purchased more than 100 Layout machines.
N: Yes, I remember when I started working here. The Layout Machine was already an essential tool. Place a car on a surface plate, place two Layout Machines with one on each side of the car, and measure the dimensions using arms. I guess we still use more than 80 machines actively across our facilities. The machines are used in the measurement of large parts, such as mainframes of automobiles. We use the machine not only at three locations in Japan but also at locations in other countries. A machine is used in various situations and is very durable, helping us a lot, but it will need maintenance once every few years. From our point of view, we want it to be done quickly as the measurement schedule is tight. A machine expert from Tokyo Boeki Techno-System comes for the maintenance work and completes it in a few hours, so we really appreciate such quick service. We are currently using more than 20 machines at the headquarters, so we often have service personnel come over from Tokyo Boeki Techno-System. They respond quickly to our questions and issues, giving us the feeling of security.
Interviewer: Your company purchased laser trackers. How do you like them?
T: We originally used a system by another company for scanning. By using the system, we had to take photos (scan) with a special camera to measure an object, and it took two workers about one and a half days to measure a clay model.
Before scanning with a camera, we had to attach stickers to an object to be measured, which serves as a target in measuring to locate several points on the object. We had to mark with such stickers at nearly 100 points in total. After the measurement, we had to remove the stickers carefully not to scratch the object. This preparation and cleaning process was such a hassle. In addition, the special camera weighs tens of kilograms and there was a limitation in the range of the rail which regulates the movement of the camera, so it was hard work to set positions. It is also dangerous to handle the heavy camera, so we had to do it with two people.
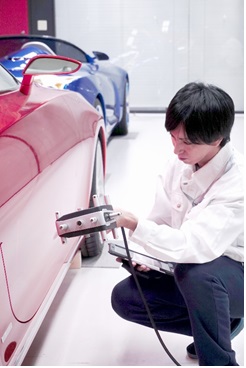
O: On the other hand, I can handle the hand-held T-Scan laser tracker with one hand. As it uses non-contact laser, it is very easy to handle it around an object to be measured. I can just lower my hand to measure the undersurface of a car. I feel such a really big change with the laser tracker from the previous system we used in terms of size.
The time required for measuring was also significantly reduced. We don’t need any preparation, so we can start measuring once a laser tracker is in hand. For measurement of a large surface, I can simply make a motion like passing the machine over the surface by hand and the measurement values are imported into a PC. The measuring speed has been greatly enhanced. Among others, being able to conduct measurement by myself is the biggest advantage, reducing the personnel costs and time.
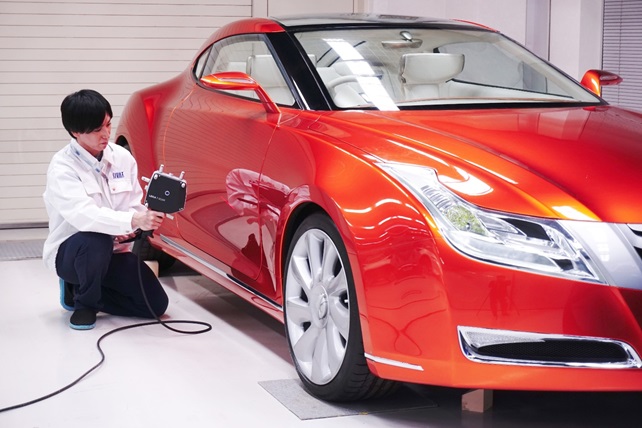
I believe that using a laser tracker one person can complete the measurement of a car in the previous third of the time. Since the actual amount of our operation has been reduced to one third, I felt less pressured. We can do it in one day, we don’t have to spend two days. This is a very big difference to us.
N: In addition to automobile body models, we sometimes measure small parts, such as wheels and interior items. I think T-Scan is the fastest measuring device to acquire data. We had to move an arm-based measuring system several times, but this hand-held type is very convenient. For accuracy, the laser can achieve measurement at a level of 0.01 mm. We now have only one T-Scan at the headquarters, but various divisions are using it in turn.
Interviewer: When we talk to people in the industry, your company has a high reputation in terms of speed and accuracy.
N: We always keep the “QPS” firmly in mind. This stands for Quality, Price, Service, and Speed. Currently, we are faster by far than our competitors in development and production. When I talk to some clients, I think they expect much quicker delivery from us than from other companies. I believe we have been improving our know-how and technologies to meet such expectations.
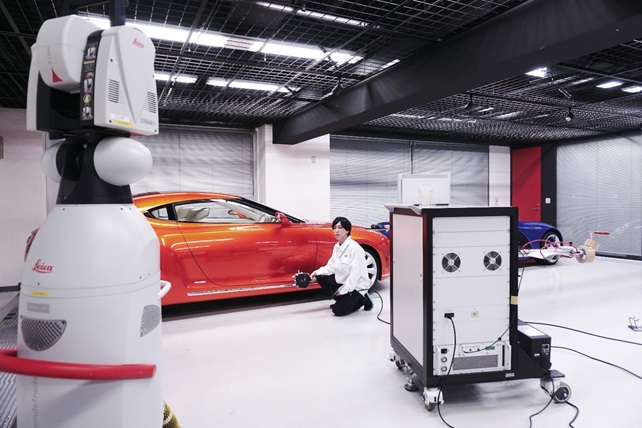
As the introduction of the laser tracker largely contributed to our facilitated operation, we are currently considering introducing it to locations in the US. I am also fascinated by the evolution of the Leica Laser Tracker. I know there is a latest model that is highly miniaturized. We are very surprised at the size.
I hope we can continue to consult with Tokyo Boeki for the development of measuring tools and methods suitable for our objects to be measured and our unique environment. By doing so, I think our operation will achieve further sophistication and a further increase in overall efficiency can be expected. I really hope we can work together based on our respective strengths to keep the good relationship between our two companies.
Sivax Inc.
Starting its business in July 1961, the company was established as a limited company called Shibazaki Kigata Seisakusho in February 1964. It gradually extended its reach in design, planning, manufacturing, and sales of automobiles, airplanes, ships, sport items, interior items, electronic equipment, and other industrial models, expanding the scale of the company. Since the change of the name to Sivax Inc. in April 1990, the company has maintained its outstanding performance, increasing the number of locations in Tochigi and Aichi, as well as in Thailand, China, and the US. The company is especially highly acclaimed in the development of automobile-related models and has been working with mainly domestic automobile manufacturers.
Product used in this case study
Leica Laser Tracker


